Friday, April 12, 2013

Mini Album.

Mini Album Blog Hop!


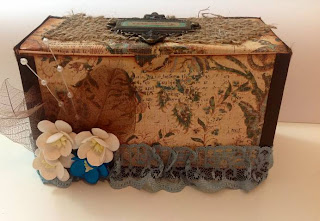
I made this small and cute travel mini to incorporate into my next album I will be making of our family summer vacation in July 2013. I used a travel paper kit from Making Memories I received in a RAK a while back. For the mini I added different ribbons, trims, and fibers from my stash as well as buttons and I am rose flowers. The butterflies you see here are from Martha Stewarts butterfly punch. I hope you like and enjoy the mini album and give it a try yourself.


                                                                          Photo 1
Photo 2


Photo 3


Thank you for taking the time out to check out my projects, if you like my project and you are not already a follower, you are encouraged to follow!


Cheers,
Crafty X


Wednesday, March 13, 2013

Burlap Journal.

Hi everyone,


Okay, so my project. I made a mix media journal from an old book I purchased at my local thrift store. My sisters 30th birthday was approaching, so I decided to make her a journal and incorporate burlap, which worked perfectly to showcase for the hop.

Hence I have a lot of step-by-step photos of the project so please don't get bothered by it. Showing all these images is essential since it shows the start to finish of the journal.  Only two pieces of burlap material for the cover and several more pieces to make the inside pockets to hold tags and such.

I will be making a process video on my youtube channel making another journal to actually show how I made it. So if you are interested in watching a video tutorial please visit my youtube channel AF0093 and Subscribe to stay updated of my latest video posts.

Thank you so much for stopping by!

1 yard of red 2" burlap ribbon
1 yard of white 2" burlap ribbon
1 yard of mint green 1" 
1 yard of 1.5" jute ribbon in natural 
1 yard of your choice of colored 3/8" jute ribbon (see my etsy store)And pick 2 colors of jute twine (see her etsy store)   http://www.etsy.com/shop/MyLifeInArtsNCrafts


Cheers,
CraftyX


Step 1- Gesso the entire book, selecting random embellishments, adhered with medium, let dry.


Step 2- Add more Gesso to entire front cover & embellishments, let dry. 


Step 3- Sprayed the back cover of book using LSG sprays, let dry. 


Step 4- I also sprayed the front cover with 4 different LSG sprays and let dry, then applied more sprays according to my like until I acquired the vintage-shabbychic look I was looking for. I add a Michaels photo frame to the front cover, My sisters name begins with the letter M so I added a chipboard letter and used some of the book pages as a frame background adhered and let dry. 


Step 5- Sprayed more on cover & frame to match the colors evenly thruout the entire front cover, let dry completely. 


Step 6- Working on the binding, I tore all inside pages of the book and left the actual book spine, cut a white piece of medium thick chipboard for more stability, then punched two holes, as shown here. 


Step 7-  Selected the pages to go into the journal choose 4 different colors of thick journaling paper, vanilla, gray, white, & black. Then punched two holes on all papers. 


Step 8- Here I used pretty white seam binding to put the pages together and bind to the journal cover.

Step 9- Used two eye lets to secure the binding holes for seam binding and paper to hold better. 


Step 10- Binding done and completely dryed. 


Step 11- Inside pages bounded and complete. 


Step 12- Made inside pages &pockets for the journal used more burlap in green color and canvas material to create pocket holders for tags. I also gessoed the inside cover pages and adhered pieces of the book pages to make it look vintage. All the embellishments seen on these two pages are by Tim Holtz, Graphic45, Prima, LSG sprays, Recollections, my own metal findings and tags from Michaels recollection packs. 

Step 13- Another inside page made with pockets. 


Step 14- More pages. 


Step 15- I used a Tim Holtz metal claps to create a closure and attached it to two charms I had. 


Step 16- The closure. 


Step 17- The final back cover color and a vintage charm conected to the closure clasp. 


All finished and ready to pack. I also made the gift box out of a chocolate box. 


Journal all packed up and ready to be delivered. Hope you guys liked it! Any questions let me know. 


Many thanks and have a crafty day! 


Thursday, January 3, 2013

Handmade Journal.

Well, it has been two years since I made this journal. Why it took me so long to upload and share the picture? I have no idea. I suppose I never got to it until I found the photo in my iPhoto library. I made this journal for my friend Alina, for her birthday again two years ago.

I also have a video which I will attach to this post down below in which I show the how-to and process. I hope you like it and keep in mind we can create anything with just about anything!

Happy New Year and keep crafting!

CraftyX


Monday, December 3, 2012

"Family Photo" 12x12 Layout.

So here goes another YTLH© for the month of November we decided to scrap about family. And of course I chose a photo that includes all 5 of us. The photo was taken in Orlando, Florida at Disney Animal Kingdom this past summer 2012.

We had such a great time at the Disney theme parks and we really enjoyed Florida. It was a road trip from Chicago to Orlando and it sure was far, but rather fun.

I hope you enjoy the layout. I have also included a process video on how I made the layout. Anyone is welcome to join us in the monthly YTLH© just send me a message on youtube or the YTLH© facebook fan page, link are provided in the top of my blog interface.

Cheers,
CraftyX


Monday, November 12, 2012

Altered Tea Box

Hi everyone,

I want to share these cute boxes I made from empty tea boxes. I drink lots of tea 2-3 cups daily and when I have a perfect shaped box I don't toss it. I like to keep them and upcycle them for a better use. I hope you enjoy the pictures. I have also attached the process video, if you have youtube please subscribe and like my video it helps my channel grow.

Cheers,
CraftyX


Thursday, October 25, 2012

Road Trip Mini Album.

I created this mini album of our past summer 2012 family vacation. We went on a road trip from Chicago to Florida. The kids had an awesome time and enjoyed it very much. Especially once we had arrived at the Disney Resort in Orlando, Florida.

The road trip was quite a long ride, but we all had a great time. From stopping at local restaurants to filling up the car with gas, I think this was the kids favorite part because they had a chance to stretch their legs and go into the store to buy chips and candy.

It took me more than a week to finish the actual mini and another week to edit the video I made of the process. At the end it was worth the time invested. I hope you guys enjoy it and watch the video too.


Cheers,
CraftyX

 Front cover---->
 Page 1--->
 Page 2--->
 Page 3--->
 Page 4---->
 Page 5---->
 Front cover--->


Video below.


Thursday, September 27, 2012

Micro Mini Album

I made this micro mini album using empty cereal boxes and cut to 3x4 size used 6 pieces to make the mini. I really like the new Prima vintage trinckets so had to incorporate those to the mini. Also used some Prima flowers and K&Company "Ancestry" paper collection.

I know, I don't show the inside of the mini, but trust me it came out too cute! I made it for my sister to cherish and put photos in it.

Hope you guys like it!

Cheers,
Crafty X